 Free Shipping | Limited Time Only
Your Cart is Empty
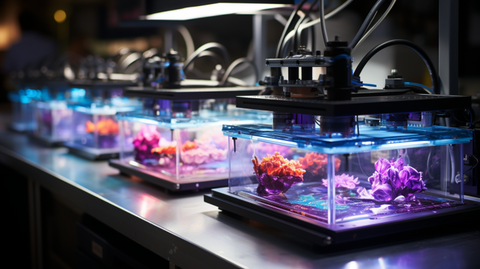
Check out our black light collection!
Delicate, colorful, and beautiful, here is how to give your fine resin prints a touch of longevity with UV light curing.
Congratulations! You’ve curated your perfect resin design and have the colors popping exactly how you want them to. But you need a little more - you want to make those fancy designs on your resin prints last for a good while. UV light curing is the answer to the permanence you seek.
But like other fine resin art projects, curing resin does take some timely finesse. You need just the exact bit of timing to guarantee a perfect finish.
While it may seem like a simple task, the curing process can greatly affect the strength and durability of your final product. Understanding how long to cure your resin prints under UV light is crucial to ensuring they come out strong and ready to use.
Factors like the type of resin you're working with, the thickness of your print, and the strength of your UV light can all affect the curing time. When determining how long to cure your print, it is advisable to take these factors into consideration. Additionally, proper safety measures should be taken during the curing process to protect yourself and others from harmful UV exposure.
Resin is a type of synthetic material that can be manipulated for varied purposes, including 3D printing. Resin is often used in 3D printing because it can be cured using UV light, which makes it a popular choice for creating detailed and intricate designs. Many different types of resin are available, including epoxy resin and UV resins.
UV light plays a crucial role in curing resin 3D prints. When resin is exposed to UV light, it undergoes a process called photopolymerization, which causes the resin to harden and solidify. UV light can trigger this reaction because it has a specific wavelength that is absorbed by the resin. This process is what allows resin 3D prints to be created with such high levels of detail and accuracy.
It's important to note that not all types of UV light are the same. Different types of UV light have different wavelengths, and some types of resin require a specific wavelength of light to cure properly. This is why using the correct type of UV light when curing resin 3D prints is important.
Realizing the resin and UV light relationship is crucial for creating high-quality resin 3D prints. Using the correct type of resin and UV light ensures that your prints are cured properly and have the desired level of detail and accuracy.
Curing is an important step in the post-processing of resin prints. It is the process of exposing the print to UV light to harden and strengthen the resin. The curing time varies based on the resin used, the model's size, and the curing method. The print may be weak and brittle if not cured enough, while over-curing can cause discoloration and warping.
There are two main methods for curing resin prints: natural sunlight and curing stations. Natural sunlight is a cheap and straightforward method, but controlling the curing time and ensuring even exposure can be challenging. Curing stations provide more control over the curing process and can cure prints faster than natural sunlight.
Fast curing is possible with some resins, but following the manufacturer's endorsed cure time is paramount to avoid over-curing. Over-curing can cause the print to become brittle and prone to cracking. It is also important to note that the curing time may alternate based on the curing station's power and the distance between the print and the light source.
Curing is an essential step in post-processing resin prints. Following the recommended curing time and method is pertinent to ensure the print's strength and durability. Proper curing will result in a high-quality print using natural sunlight or a curing station.
The type of resin you use can greatly affect curing time. Each resin has its own optimal curing time and temperature range. Some resins cure faster than others, and some require higher temperatures to cure properly. It is important to follow the manufacturer's instructions for curing time and temperature to ensure that your prints cure properly.
The color of resin can affect its curing time, but the relationship is not straightforward and depends on factor such as heat absorption and opacity. Lightly colored resins tend to cure faster than dark-colored ones as they possess less pigments to absorb the UV light instead of the resin.
Temperature and humidity can also affect curing time. If the temperature is too low, the resin may not cure properly; if it is too high, it may over-cure. Similarly, high humidity can cause the resin to take longer to cure, while low humidity can cause the resin to cure too quickly. Maintaining a consistent temperature and humidity level when curing resin prints is important.
The intensity of the UV light source can also affect curing time. Higher-wattage UV lamps will cure the resin faster than lower-wattage lamps. Additionally, the wavelength of the UV light can also affect curing time. Some resins require a specific wavelength of UV light to cure properly, so it is important to use a UV light source that is compatible with your resin.
Larger prints generally take longer to cure than smaller ones. This is because the curing process must penetrate deeper into the resin to solidify all the layers, and this depth increases with the size of the print. The thickness of each layer also plays a role. If a larger print has thicker layers, it may take longer to cure compared to a smaller print with thinner layers.
The complexity of a 3D print refers to the intricacy and density of the model. Prints with intricate details, overhangs, or fine features may take longer to cure because the resin needs to flow into these areas and solidify properly. High-complexity prints may require additional curing time to ensure that all the resin is adequately cured throughout the print, including hard-to-reach areas.
Always follow the curing recommendations provided by the resin manufacturer. They often specify the recommended curing time and light intensity for their specific resin.
Following the manufacturer's instructions and maintaining a consistent environment ensures that your prints are cured properly and have the desired properties.
The average curing times for resin prints can vary depending on several factors, including the type of resin, the thickness of the printed object, the curing method used, and the desired level of post-processing. However, here are some general timelines for curing resin prints:
Standard resin: 5-15 minutes per side (bottom and top) for each layer. Thicker layers may require longer curing times.
High-detail or dental resin: 1-5 minutes per side per layer.
UV curing chambers designed for prints typically require 20-60 minutes or more, depending on the resin and the object's size and complexity.
Curing in direct sunlight can take longer, typically 30 minutes to a couple of hours, depending on the strength of sunlight and the resin's sensitivity to UV light.
Some resins are water washable and require post-processing in water after printing. The curing time for these resins may be shorter, often around 5-10 minutes per side.
It's essential to follow the manufacturer's recommendations for curing times and methods, as they can vary significantly between different resin brands and types. Additionally, consider the post-curing method you choose, as it can impact the final strength and surface finish of your 3D prints.
Keep in mind that thicker parts, large models, or objects with intricate details may require longer curing times to ensure that the resin is fully cured and hardened. Overcuring can also be detrimental, so it's essential to find the right balance for your specific prints.
When curing resin prints under UV light, it is important to take safety precautions to avoid any potential harm. Here are some safety measures you should consider when curing your resin prints:
Before starting the curing process, ensure you have the appropriate protective gear. Put on nitrile gloves to safeguard your hands from any toxic chemicals, and safety goggles to protect your eyes from any potential splashes. It is also advisable to wear a face mask to avoid inhaling any toxic fumes.
Curing your resin prints in a well-ventilated area is important to avoid inhaling any toxic fumes. Ensure that your workspace is properly ventilated by opening windows or using a fan. Additionally, it is advisable to wear precautionary clothing to avoid any potential splashes on your skin.
Safety should be your top priority when curing resin prints under UV light. By adhering to these safety precautions, you can guarantee a safe and successful curing process.
After printing your 3D resin prints, the curing process is not yet complete. The post-curing process is essential to ensure that your prints are properly cured and have the desired mechanical properties. The post-curing process involves removing supports, washing and drying, and final inspection.
The first step in the post-curing process is to remove the supports from your resin prints. You can use a scraper to remove the supports, being careful not to scratch the print. It is expedient to put on gloves to prevent any fingerprints on the print.
After removing the supports, it is time to wash your resin prints. You can use a DIY resin curing station or an Anycubic Wash & Cure Plus to wash your prints. Fill the wash container with 90% isopropyl alcohol and place your prints in the container. You can also add a rotating turntable to ensure even cleaning. After washing, dry your prints with towels or paper towels.
The last step in the post-curing process is the final inspection. Inspect your prints for any defects or imperfections. You can work with a toothbrush to rid off any remaining resin on the print. Place your print on a silicone mat or aluminum foil and place it on the turntable. Turn on the curing station and cure your print for 30 minutes.
When curing resin prints, it's not uncommon to run into issues. Troubleshooting refers to the process of identifying and resolving problems or issues in curing resin pieces.
Here are some common problems you may encounter and how to troubleshoot them.
If your resin prints are not fully cured, they may be weak and brittle. Several factors, including insufficient exposure time or distance from the UV light source, can cause this. To troubleshoot under-curing, try the following:
Over-curing can cause your prints to become too hard and brittle, making them prone to cracking and breaking. This can be caused by excessive exposure time or distance from the UV light source. To troubleshoot over-curing, try the following:
Remember that over-curing can also be caused by using a resin incompatible with your printer or UV light source. Be sure to check the manufacturer's recommendations for curing times and distances.
In addition to curing issues, it's important to consider the durability of your resin prints. If you plan to use them for functional purposes, such as jewelry or other small objects, you may want to consider using a resin that is specifically designed for durability. Be sure also to consider any fumes emitted during the curing process and take appropriate safety precautions.
Troubleshooting curing issues with resin prints can be a bit of an experiment. By adjusting exposure times and distances from the UV light source, can present you with the right balance for your specific printer and resin. Remember always to follow manufacturer recommendations and take appropriate safety precautions.
Knowing the right UV light to use with your resin is an important skill to learn. Although it may seem like every UV light should work with every form of resin, there really is a delicate balance for each light and form of resin to guarantee perfection. Here are three UV light options to consider:
A UV flashlight is a portable, affordable option for curing resin prints. It's great for small prints or hard-to-reach areas. However, it has a limited curing area and can take longer to cure larger prints.
A UV lamp is a more powerful and efficient option for curing resin prints. It has a larger curing area and can cure prints faster than a UV flashlight. However, it can be more expensive and may require a dedicated curing station.
Natural sunlight is a free and easily accessible option for curing resin prints. However, it's not as consistent as UV lamps or flashlights, and curing times can vary depending on the weather and time of day.
When choosing the best UV light for your needs, consider determinants such as the size of your prints, budget, and curing environment. With the right UV light, you can ensure that your resin prints cure properly and look their best.
If you want to cure your resin prints swiftly and more evenly, you can try the rotating curing method. This method involves placing your print on a rotating platform and exposing it to UV light from all angles. This ensures that every part of the print is cured evenly and thoroughly. You can use a turntable or a motorized platform to achieve this effect.
To use this method, you must set up a UV light source above the rotating platform. You can use a UV lamp or a UV LED strip. Ensure the light source is positioned at the right distance and angle for optimal curing. You may need to experiment with different distances and angles to find the best configuration for your prints.
If you're looking for a more cost-effective way to cure your resin prints, you can make your own DIY curing station. This involves building a box or enclosure that can expose your prints to UV light. Constructing the enclosure, you can use materials like cardboard, foam board, or wood.
You can use a UV lamp or a UV LED strip to create the UV light source. Ensure the light source is positioned at the right distance and angle for optimal curing. You can also add reflective material to the interior of the enclosure to increase the UV exposure.
When building your DIY curing station, make sure to consider factors like ventilation, safety, and accessibility. You may also want to add features like a timer or a temperature controller to optimize the curing process.
By using these advanced curing techniques, you can achieve faster and more consistent curing of your resin prints. Whether you choose the rotating curing method or the DIY curing station, make sure to experiment and find the best configuration for your prints.
The curing time for resin prints under UV light depends on various factors, such as the type of resin, the print's thickness, and the UV light's power. While taking these factors into consideration, the ultimate prescription should be to follow the manufacturer's instructions for the resin and the UV light to ensure proper curing.
If you are unsure about the curing time, you can perform a simple test by curing a small sample print and checking its hardness. You can also use a UV light meter to measure the intensity of the UV light and adjust the curing time accordingly.
Remember to put on protective wears when working with resin and UV light and properly dispose of waste materials. With the right techniques and precautions, you can achieve high-quality resin prints that are fully cured and ready for use.
The optimal time for curing resin prints under UV light varies depending on the resin type and the UV light source. However, a general rule of thumb is to cure the print for at least 30 minutes to 1 hour.
Following the manufacturer's guidelines for curing time is important, as over or under-curing can affect the print quality.
To determine if your resin print is fully cured, you can perform a simple test by gently pressing your fingernail into the print surface. If the surface is still soft or leaves an indentation, it's not fully cured. If it's hard and doesn't leave any marks, it's fully cured. Another method is to use a UV light meter to measure the light intensity and ensure it's within the recommended range.
Yes, over-curing a resin print can cause issues such as brittleness, cracking, and discoloration. It's important to follow the manufacturer's guidelines for curing time and avoid leaving the print under the UV light for too long.
The recommended curing time for Anycubic resin prints is 5-10 minutes under UV light with a wavelength of 405nm. However, following the manufacturer's guidelines for curing time is important, as it may vary depending on the resin type and the UV light source.
No, it's not possible to cure resin prints without UV light. UV light is necessary to activate thephotopolymerization processthat hardens the resin. However, alternative light sources, such as LED lights, can be used for curing resin prints.
It's recommended to wash resin prints in water or alcohol for at least 5-10 minutes before curing. This helps to remove any uncured resin and improve the print quality. However, it's important to follow the manufacturer's guidelines for washing time and avoid leaving the print in the solvent for too long, as it may affect the print quality.