 Free Shipping | Limited Time Only
Your Cart is Empty
Check out our black light collection!
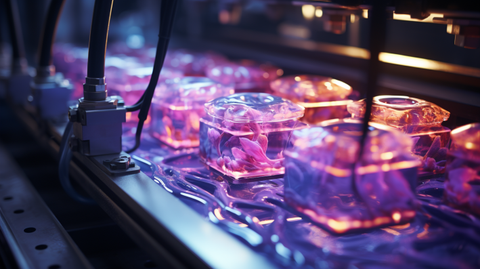
Unlock the Magic: Learn How to Cure Resin with UV Light! Dive into the art of crafting with our expert guide.
Resins have become a household name for beautiful, colorful, and glittery designs. They have an excellent reputation for lasting for ages while maintaining their beauty through curing with UV light.
UV curing is a resin processing method that utilizes ultraviolet light to initiate a photochemical reaction to make the resin hard and durable. Curing is a fundamental resin production process that can take time to get right. Fortunately, UV light can make the curing process much easier and more efficient. In this article, you'll learn everything you need to know about curing resin with UV light to perfect your beautiful designs.
Join us on a journey to demystify the curing process, highlight best practices, and equip you with the knowledge and skills to cure resin with UV light like a pro. Whether you're a beginner looking to explore a new hobby or an experienced resin artist aiming to refine your techniques, this article is your gateway to achieving brilliant and flawless resin creations. Let's dive in and uncover the secrets to perfecting your resin curing process with the power of UV light.
If you are working with synthetic resin, you may already know that curing it with UV light is one of the most efficient ways to get a solid and durable result. UV light, or ultraviolet light, is a type of electromagnetic radiation with a shorter wavelength than visible light. It can penetrate through the resin and initiate a chemical reaction that hardens it.
UV lamps are the most conventional fount of UV light for curing resin. They come in different shapes and sizes and emit different types of UV radiation depending on their wavelength. Some lamps emit UVA radiation, which is less energetic and penetrates less deeply into the resin. Others emit UVB or UVC radiation, which are more energetic and can cure the resin faster but can also be more harmful to your skin and eyes.
UV resin is a class of liquid resin that is specifically designed to cure with UV light. It usually contains aphotoinitiator, which is a chemical compound that absorbs UV radiation and triggers the hardening process. UV resin kits are readily available and can be used for various applications, such as jewelry making, model building, and 3D printing.
When using UV light to cure resin, it is pertinent to remember that the curing time depends on various factors, such as the resin's type and thickness, the UV light's intensity and wavelength, and the distance between the light source and the resin. It is also important to wear protective gear, such as gloves and goggles, to avoid direct exposure to UV radiation.
Curing resin with UV light is a fast and efficient way to harden your resin projects. The curing process involves exposing the resin to a UV light source, which initiates a chemical reaction that hardens the resin.
The curing time can vary based on the type and thickness of the resin, as well as the intensity of the UV light source. For best results, use a curing station specifically designed for resin projects. These stations use high-intensity UV lights and offer a consistent and even cure, ensuring that your resin is fully hardened.
When the resin is exposed to UV light, the photoinitiators in the resin absorb the energy from the UV photons. This energy activates the photoinitiators, causing them to break down and generate free radicals or other reactive species.
These free radicals or reactive species then initiate a chain reaction called polymerization. During polymerization, the individual molecules in the liquid resin link together to form larger polymer chains. This process continues until the resin solidifies or cures completely.
To cure faster, you can increase the intensity of the UV light or reduce the distance between the light and the resin. However, be careful not to over-cure your resin, which can cause it to become brittle and crack over time.
When using a curing station, make sure to follow the manufacturer's instructions for the recommended curing time and distance from the light. This will help ensure that your resin is fully cured and ready for use.
Overall, the hardening process of resin with UV light is a quick and effective way to achieve a durable and long-lasting finish for your projects. You can achieve consistent and reliable results every time by using a curing station and following proper curing techniques.
You will need a few essential materials and equipment to cure resin efficiently with UV light. Here is a list of what you will need:
Ensure you have all the necessary materials and equipment before starting your resin curing project.
One of the first steps is to properly prepare your workspace to cure the resin with UV light. Clean and dry the surface where you will apply the resin, and ensure it is thick enough to hold the resin without cracking. This will help avoid any issues with the resin curing unevenly or becoming brittle over time.
When mixing the resin, follow the instructions carefully and thoroughly mix it. Apply the resin in thin layers, waiting a few seconds between each layer to allow it to settle. The depth of each layer will rely on the project, but it is important to avoid applying too much at once, as this can cause the resin to become cloudy or develop air bubbles.
The temperature and humidity can also affect the curing time of the resin, so ensure that the area you work in is well-ventilated with a consistent temperature. Use a UV lamp with a wavelength and energy output suitable for your resin, and ensure that it is of good quality to avoid any toxic fumes or uncured resin.
After curing, you may need to post-process the object to achieve the desired finish. The cured resin should be durable and transparent, without air bubbles or cloudiness. If necessary, use a toothpick or glue to fix any imperfections.
Curing resin with UV light has many advantages, including fast curing times and a long shelf life. With adequate groundwork and application, you can design beautiful, durable objects for jewelry making, adhesive, and more.
Once the curing process under UV light is complete, the post-curing process must commence to ensure it is fully cured and hardened. This process involves repeatedly washing and curing the resin but with slightly different steps.
Firstly, you will need to wash the resin thoroughly to remove any uncured resin that may be on the surface. This can be done using a wash and cure station specifically designed for this purpose. Alternatively, you can wash the resin manually using a solvent such as isopropyl alcohol.
Once the resin has been washed, it is time to perform the post-curing process. This involves exposing the resin to UV light again, but this time for longer. The exact duration of the post-curing process will depend on the type of resin you are using, so be sure to study the manufacturer's direction.
For beginners, it is important to note that post-curing is just as important as the initial curing process. Skipping this step can result in a resin that is not fully cured, impacting its durability and strength.
By performing the post-curing process, you place a premium on your resin product, guaranteeing it is fully cured and hardened, increasing its durability and strength. This is particularly important if you are creating objects that will be subjected to wear and tear.
Above all technicalities or maneuvers, taking safety measures to protect yourself is paramount when working with UV light to cure the resin. One of the most important safety measures is to wear eye protection. UV light can cause damage to your eyes, and extended unprotected exposure can result in damaging eye problems. Ensure you put on safety glasses designed to protect against UV light.
In addition to wearing eye protection, wearing protective clothing that covers your skin is also important. Overexposure to UV light can cause skin damage and increase your risk of skin cancer. Wear long-sleeved shirts and pants, and avoid exposing your skin to UV light as much as possible.
Working in a well-ventilated area is also important when working with UV light. UV light can produce harmful fumes that can be dangerous if inhaled. Make sure to work in a well-ventilated area and wear a respirator if necessary.
Finally, it is of the essence to handle the UV light source carefully. UV light can be dangerous if not handled properly and can cause serious injuries if it breaks or is mishandled. Make sure to follow the manufacturer's instructions carefully, and avoid touching the bulb or any other part of the light source with your bare hands.
By taking these safety measures, you can minimize your risk of injury or harm when working with UV light to cure resin.
Creating artful resin materials is an enlightening process whose climax is curing under ultraviolet light. While the design process in itself is fulfilling, guaranteeing your design will remain as is for years to come through ultraviolet light is indeed the ultimate goal.
The curing process involves combining the resin mixtures, layering them bit-by-bit with artful accuracy in a set mold, and exposing the mold to the prescribed wattage and wavelength of Ultraviolent light. The resin casting process is artful but requires strict adherence to professional instructions to guarantee perfect results.
The prescribed curing instruction does not act to undermine your artistic tendencies. Instead, it is there to enhance it even more. Combining the technical brilliance of professional instructions with your creative instincts is a no-brainer for divinely artistic pieces that will maintain their charming glare for years to come.
When it comes to curing resin with UV light, it's important to use the right kind of light. The best UV light for curing resin is one that emits UV-A light with a wavelength between365-405 nanometers. You can use a UV lamp or a UV flashlight, but ensure it emits the right wavelength of light.
The curing time for resin with UV light can differ based on the resin's thickness and the UV light's strength. Generally, it takes around2-5 minutes to cure a thin resin layer with a UV lamp or flashlight. Thicker layers may require more time or multiple passes with the UV light.
Yes, UV light is an effective way to harden the resin. When exposed to UV light, resin initiates a chemical reaction that causes the resin to harden and cure.
A high-intensity UV light is the fastest way to cure UV resin. A UV lamp with a high wattage or a UV flashlight with a high output will cure resin faster than a weaker light. However, be careful not to overexpose the resin to the UV light, as this can cause it to become brittle.
Yes, UV resin can be cured without sunlight. UV resin is designed to cure when exposed to UV light, which can come from a UV lamp or flashlight. Sunlight can also cure UV resin, but it may take longer than using a UV light.
To use UV resin in molds, prepare it by cleaning it and applying amold release agent. Then, pour the UV resin into the mold and use a toothpick or other tool to remove any bubbles. Finally, cure the resin with a UV lamp or flashlight according to the manufacturer's instructions.